A variety of factors, including wear and tear and non-ideal installation conditions, can cause the performance of an instrument to deviate from its original calibrated values, making it important to check calibration on a regular basis.
Introduction
The quality of data from any industrial process is only as good as the device used to collect it. Depending on what’s being measured, the slightest deviation in performance can have a major impact in areas including product quality, energy consumption, efficiency and even safety. Neil Brown, Team Leader for ABB Measurement and Analytics Service Workshop in the UK, explains the importance of calibration and how to ensure that it is properly carried out.
Even the most accurate instruments undergo subtle changes throughout their operational life, many of which only become evident over the course of time. If left unchecked, these changes can make a material difference between what you think is happening in your process and what is actually happening.
Calibrating your instruments on a regular basis can help counter this by resetting a drifting instrument to its original accuracy.
The importance of calibration
Correct calibration is a vital step in correcting drifting performance that almost certainly arises throughout the lifetime of an industrial instrument. Instruments such as pressure / temperature sensors / transmitters and flowmeters are all calibrated when they were first manufactured to check their performance under a known set of operating conditions. As such, the calibration of an instrument can play a major role in its ability to deliver accurate and repeatable readings.
Although this calibration is valid when the instrument is first installed, it cannot be assumed that it remains so indefinitely. Factors such as wear and tear, degraded electronics, sensor plugging, vibration, ambient temperatures and non-ideal installation locations resulting in exposure to the elements can all cause the performance of an instrument to drift from its original calibrated values. In particular, arduous processes cause instruments to drift, such that failure to routinely take a device out of service and calibrate it could lead to a measurement error. Drift is also quite prevalent on older instruments compared to the new generation of devices, new devices feature improved electronics with self-checking routines built-in and a more robust mechanical design. Nothing in life is constant and this is equally true of electronic components that can undergo a change in performance due to small chemical and / or physical changes with time, resulting in unavoidable long term drift. The calibration of an instrument is often compromised as soon as it is installed. In many cases, installers calibrate a device to the installation using their own devices, destroying the original factory calibration. The resulting new calibration is only as good as the equipment they are using that, in some cases may themselves not be calibrated correctly.
It is important to be aware that any of these factors could affect a manufacturer’s guidelines when it comes to the frequency of calibrating their instruments. Even where a manufacturer recommends a longer period between calibration checks, the characteristics of the installation conditions can impact on the performance of the transmitter and/ or primary sensing element. In such applications, more frequent calibrations, or at least inspections, may be necessary.
Calculating the calibration error of a device can be summarized by the following basic equation:
ERROR = ACTUAL READING – ‘TRUE’ READING
In this equation, the ‘true’ reading is the original specified or required accuracy for the application. The error produced by the equation provides the basis for the correction of the device to a properly calibrated state.
Depending on the type of instrument and the nature of the production process it is being used in, it can be preferable to be able to check and adjust its calibration without having to remove it from the line. This not only prevents disruption caused by removing and replacing the instrument, but also helps to avoid the introduction of any external factors that could affect its calibration.
As a general rule, the frequency of calibration of a device depends on a combination of three things:
1 The nature of the application it is being used in
2 The performance the user needs from it
3 The inherent operating conditions
An example is safety critical systems where multiple instruments are used for redundancy. Here it is advisable to check the calibration of each instrument and recalibrate, if necessary, to avoid measurement discrepancies between each instrument and ensure that each instrument is operating accurately and safely.
A starting point for determining the frequency of calibration is to use historical calibration data, that can be used to help create a schedule for calibrating devices. This can range from manual records through to smart trending software, that can help to set priorities for calibrating equipment based on how far their performance drifts over a set period of time.

Meeting the requirements
Standards such as Section 7.6 of ISO9001:2008 oblige companies to maintain and calibrate their measurement instruments on a regular basis, the frequency of which is dictated by the specific requirements and demands of the application. Additional requirements include the need for instruments to be clearly labelled with information, including its calibration status and the date when the next calibration is needed, and the need for protection against accidental damage and deliberate interference.
Traceability is also a key requirement where it must be proved that your device was calibrated by a properly qualified and competent testing and calibration laboratory. ISO17025 stipulates key management and technical requirements for ensuring that laboratories are operating the correct quality management systems and that any tests and calibrations are performed to the correct levels of accuracy and reliability.
This includes the need to demonstrate their competence supported by evidence of a documented quality management system. Any facility purporting to offer testing and calibration facilities must be able to prove that they are accredited to the standard in order for their results to be considered valid.
Who should calibrate your device?
There are many organizations in the UK that can perform calibration of measurement instruments. When choosing which one to use, it is advisable to find one that is accredited to ISO17025 by the United Kingdom Accreditation Service (UKAS).
The ISO17025 standard covers any organization offering testing and calibration services. Its purpose is to ensure that anyone purporting to calibrate a device is competent to do so to ensure the accuracy of the resulting data from their calibration process. Recognizing that different laboratories often use different methods to test and calibrate a device, ISO17025 covers both standard and non-standard methods, as well as any procedures developed by the laboratories themselves.
An accredited organization is able to demonstrate a Schedule of Accreditation, detailing their UKAS laboratory number, the address of the accredited facility, the date it was accredited and the types of testing and calibration that it has been accredited for. For end users, this means that as long as an organization and its procedures are accredited to ISO17025, they can rely on the credibility of the calibration and the conditions it was performed under.
Ask the experts
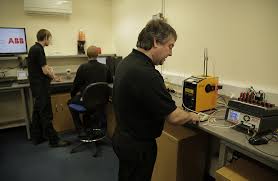
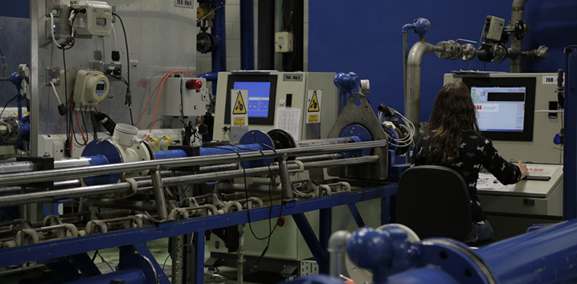
As in many walks of life, it can pay to get expert help when it comes to calibration and testing. As an instrument manufacturer and a specialist in the provision of testing and calibration services, ABB has its own testing and calibration facilities for flow, electrical and pressure and temperature instruments. Accredited to ISO17025 by the United Kingdom Accreditation Service (UKAS), these facilities are available to both customers and third parties.

Figure 2 Accredited to ISO17025 by UKAS, ABB’s facilities are available to both customers and third parties
Calibration – things to look for
Was your device calibrated to a known standard by a properly qualified and competent testing and calibration laboratory?
In the UK, facilities that are accredited to perform testing and calibration services should be able to provide evidence of having been assessed by the United Kingdom Accreditation Service (UKAS)
Variations in product quality
The end quality of your products can be affected if instruments are not providing the correct data needed to control the process properly
If two or more instruments are used for the same measuring point, are the readings consistent?
Unexpected readings
Are the readings from the device exceeding the expected measurement parameters?
Is there anything to show when the device was last calibrated?
If there is and the device is out of calibration, it must at least be verified and / or recalibrated if necessary. If there is nothing to show when calibration was last performed, the device must be calibrated to ensure it is performing properly.
Has the device been damaged or subjected to a shock or vibration?
If so, the calibration could have been affected
For more information on ABB products or KC Controls services contact us below and a member of our team will be in touch.
More Articles


